Fixing the Node.js Version Error for Next.js
Writing about my journey to become a React Developer
I recently encountered an error while working on a new project. As a Frontend Developer, I also pride myself on being a React developer. React.js is the most popular JavaScript library, and I’ve worked with it on other projects. But for this one, I chose to go with Next.js. Now, this isn’t an article to compare Next.js and React.js, but just so you know, Next.js is built on top of React.
Next.js makes life pretty easy by handling a lot of things for you. It takes care of the heavy lifting, making your site faster, smoother, and easier to find on Google. With server-side rendering, your pages load almost immediately, and pre-built pages (like creator profiles) show up instantly, no waiting around. Plus, it’s got built-in API tools, so you don’t even need a separate backend. And let’s talk about navigation, buttery smooth with automatic routing. Oh, and images? They load clean, and really fast.
After installing Next.js, I ran npm install and got this error:
**"You are using Node.js 18.17.1. For Next.js, Node.js version ^18.18.0 || ^19.8.0 || >= 20.0.0 is required."
**Basically, my Node.js version was outdated, and I needed to update it to 18.18.0 or higher to meet the requirements.
Now, there are different ways to fix this. One way is to manually download and install a newer version of Node.js, but I found a better way. In this article, I’ll walk you through the most efficient way (in my opinion) to solve this error.
So… What’s NVM, and why do you need it?
I know, I know, you’re probably thinking, "Why not just update Node.js and move on?" I had the same thought at first. But then I found out that NVM (Node Version Manager) is actually the smarter way to do it. Let me explain.
NVM helps you install and switch between different Node.js versions easily. Why is that useful? Well, imagine you’re working on two projects, one needs Node.js version 20, and the other needs version 18. Without NVM, you’d be stuck manually switching versions every time. But with NVM, it’s as easy as flipping a light switch.
Why do you need it?
Picture this: You’re deep into a cool project, and suddenly, a message pops up, "Node.js version 18.18.0 or later is required." Boom. Mood ruined. You check your system and see you’re running 18.17.1, close, but not good enough.
Sure, you could go to the Node.js website, download the newer version, and get back to work. But wait, what happens when another project needs an older version? Or worse, what if updating breaks something? You didn’t see that coming, right? That’s why NVM is a lifesaver. It’s like having a remote control for Node.js versions, switching between them is quick, easy, and safe.
Why not just update Node.js manually?
You could just download and install a new version, but here’s the catch: It replaces your current version everywhere, which could mess up other projects still using the old version. And if something goes wrong, rolling back is a headache.
With NVM, you can test a new Node.js version for one project without affecting the others. Plus, switching versions is way faster than uninstalling and reinstalling every time.
How to Install NVM
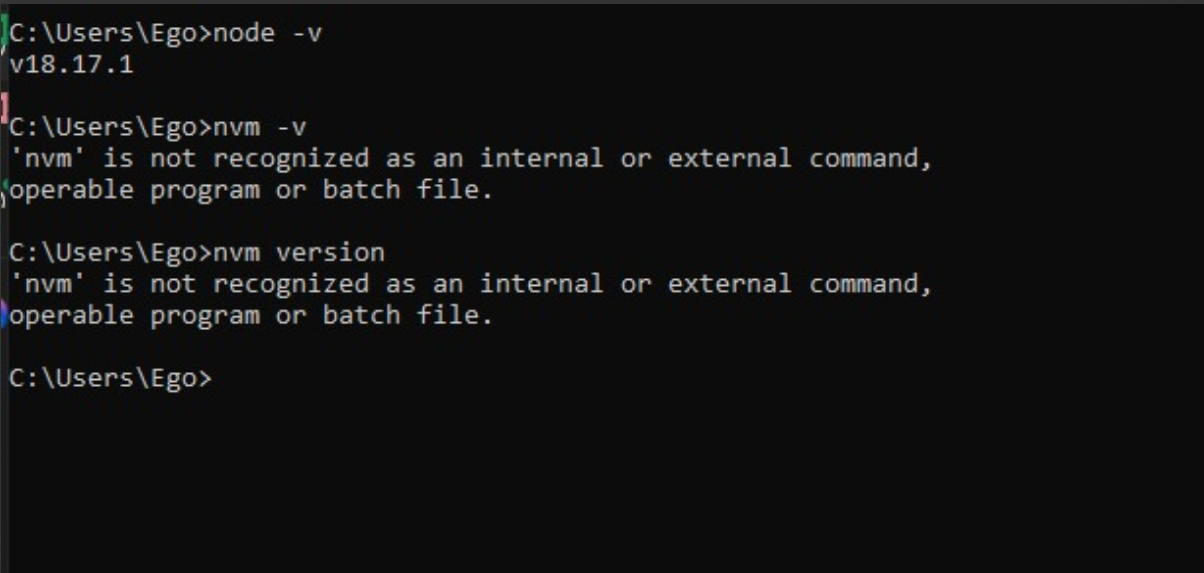
First off, make sure you already have Node.js on your system. To do that, open your command prompt (cmd) and run:
node -v
If you see a version number, that means Node.js is installed, and you need to delete it first before installing nvm, because when you install nvm node will be installed as well.
If you get an error or no response, like the image below, you can go ahead to download it.
How to delete Node.js
Go to Start Menu > Settings > Apps > Installed Apps.
Find Node.js in the list (or search for it).
Click on it and uninstall it.
Back on the command prompt, just to be sure, check if you have NVM installed
Run this command:
nvm -v
"If you see a version number, NVM has already been installed. However, if you receive a message like the one below, you need to install NVM.
How to download NVM
Go to Google and search for “Corey Butler NVM.”
Click on the GitHub repository (or go directly to this link: NVM for Windows).
Scroll down and download nvm-setup.exe.
I suggest you star the repository, as it is doing us all a great deal.
To install NVM
Go to your Downloads folder and double-click on nvm-setup.exe.
Accept the agreement and click Next, Next, Install, and Finish.
Done
Now, close your command prompt and reopen it. Run this command to make sure NVM is installed:
nvm -v
If it shows a version number, you’re all set.
To see the available Node.js versions, run:
nvm list
All the available versions will be listed

To install the latest version of NVM run:
nvm install latest
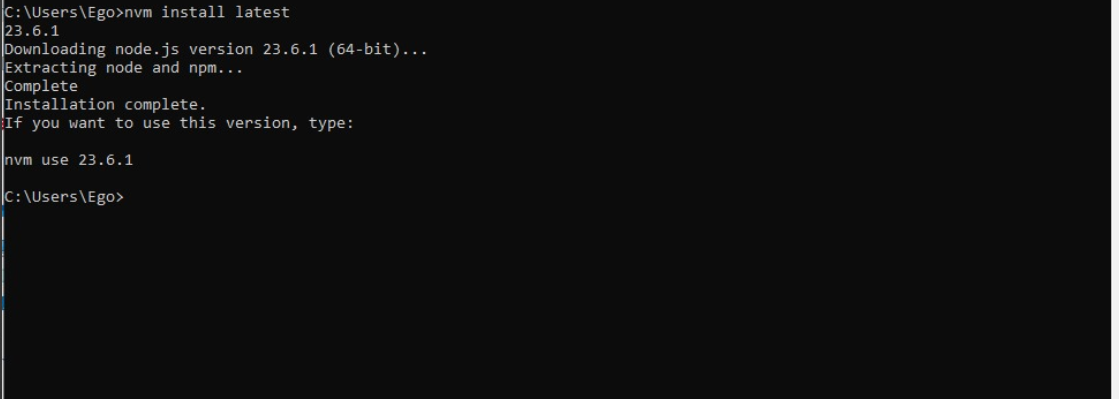
It will download the latest version of Node.js as well
Once installed, you’ll see a message like:
"Installation complete: If you want to use this version, type 'nvm use [version]'."
To check your current Node.js version, run:
nvm ls
Want to switch versions? Run:
nvm use [version-number]
For example, to use Node.js 18.18.0, you’d run:
nvm use 18.18.0
After installation, you’ll get a message like:
"Now using Node.js version 18.18.0."
Final Step
Go back to your IDE (like VS Code), close it, and reopen it. Run:
npm install
And boom, everything should install smoothly! 🚀
Now, you’ve got NVM and the right Node.js version setup with no hassle. No more version problems, just easy switching whenever you need it 😎